Emily’s DIY Pyrex Candles featured on Ruche Blog today!

Couplejonesprojects141, 2, 3, 4, 5


I am sharing my Vintage Pyrex Candle DIY on ShopRuche.com today! Have you browsed Ruche lately? It’s amazing. One of my favorite places to shop. They offer such unique choices and I love pretty much everything they have. Their dresses are GORGEOUS and I can’t get over that beautiful camera strap! So you can tell, I browse their New Arrivals a.LOT. which means I was SO excited when I got an email today letting me know that my candle DIY is featured on Ruche’s blog TODAY! Yay!

JonesCandles1


You can find my DIY at Ruche or you can find it HERE


ALSO…I love vintage Pyrex so much that I created two different FREE prints featuring my favorite patterns. You can download both of those from our shop!


JonesCandles5


guest blogger badge


Candles8

DIY Vintage Pyrex Candle Love

CoupleJones Candles

I have a little bit of a collection of vintage dishes…Or maybe I’m kind of obsessed with them. But I can really get behind a collection that is both pretty AND practical like these dishes are. My favorites are Pyrex and Fire King dishes and I LOVE going on hunts for them at garage sales. My collection is getting a little out of hand so I thought I’d share some of the Pyrex love and repurpose some of my coffee mugs as candles. I had never made candles so I was a little bit nervous – but I like a challenge!

I started by heading to Hobby Lobby where I found everything I needed – candle making wax ( I chose Creme Wax so it would be a nice creamy color), premade wicks, and candle scent. I also grabbed some clothes pins that I already had with the intention of balancing them on the cups to hold the wicks in place while the wax cooled…that didn’t work out like I planned…I’ll show you in a bit.

I melted the wax in an old pot that I had. I was a little worried about getting the wax off whatever I melted it in so I didn’t use my good pots. The directions on the wax said to use a double boiler but I don’t have one of those and this actually worked really well. I didn’t end up having a hard time cleaning the pot but I will recommend two things. 1. Plan on using all of the wax you melt, or have a throw away container to pour any leftover melted wax into so that it doesn’t sit in your pot while you are setting the candles up…don’t pour leftover wax down your drain. 2. Keep your empty pot warm by leaving the burner on a VERY low setting so that the wax residue stays melted until you are ready to wash the pot. I just used warm water and dish soap and my pot was fine. (That was more than two things, I think)

CoupleJones Candles

Your burner only needs to be on low…no need for boiling wax. Then slowly pour the wax into your cups…you will see that I am horrible at pouring without making a mess…kind of a clutz here. But the spilled wax wasn’t a big deal because I put painter’s paper down to protect my counter and once the candles were cooled, I just used a warm sponge to wipe of the excess wax from the outside of the cup.

Once you have the wax in the cups, add your scent. The oil I got from Hobby Lobby said to add ten drops but I added more…I could tell that 10 drops was going to be too light of a scent. So just start by following the directions on the oil you buy and fudge the numbers a bit if you want a stronger smelliness…not sure that’s a word. Oh well.

CoupleJones Candles

My original plan was to use a clothes pin balanced on the edge of the cup to hold the wick up but as you can see, my pins weren’t long enough to stay across the cup…lucky thing I had some leftover skewers in the drawer (from some chocolate dipped marshmallows I made a while back – yum!)…I just laid those puppies across the cups and put the clothes pins on top. Worked fabulously! Bam! Kinda feel like a 007 crafter when I work things out on the fly like that. Just call me Jones, Em Jones.
So the cups sat there for a bit…probably 45-60 mins and then they were good to go!

CoupleJones Candles

I love them. Now I’m on the hunt in my house for other cute containers that I could turn into candles. I made one for myself and two for some sweet friends…Got to get to the post office now! Thanks for reading! Hope this inspires you to try it. PS Don’t leave candles unattended and be SUPER careful with the hot wax, especially if you have little ones running around…that’s my disclaimer but this was really so much fun!

Because I’m SUCH a big fan of the patterns on these vintage dishes, I made two 8×10 prints featuring my favorite of all of the patterns that I own. They are pretty perfect for Valentine’s Day or all year round if you LOVE vintage as much as I do.

Printscollage

Vintage Dishes themed FREE Love Print


CoupleJones Love Print I LOVE vintage Pyrex and Fire King dishes. I have a little bit of a collection going.

I have a tutorial for a fun way to re-purpose them planned for next week and to go along with that tutorial, I made these two prints using my favorite patterns from my collection.

Our prints are SO easy – just click, download, print on your home printer or at your favorite place to print photos and share in your home or with a friend! Enjoy!

Happy FRIDAY!!

CoupleJones Love Print

Embroidery for Slackers and Free Light Bulb pattern

IMG_7151

UPDATE: Welcome to our visitors from BonBon Break! We are so happy to have you! I hope you enjoy this article! If you’d like to keep in touch, we’d love it so much if you followed our blog or find us on Facebook and Twitter . We love new friends!

Several years ago, we moved from our first teeny little house. For a little over 3 months after, we had to rent while we waited for our new home to be built. We wanted to save as much money as possible so we rented a one bedroom apartment – it was us and our two year old and as much stuff as wouldn’t fit in our cheap storage unit squeezed into a VERY small space and the sewing machine did not make the cut. So I decided to try embroidery for the first time.

That doesn’t mean I researched the correct way to do it or anything…that’s not really my style. I just sat down and tried it. I probably still don’t know the “right” way to do it but it’s an easy enough thing to sit down and experiment with and get going. Let’s just call my method, Embroidery for Slackers :)

IMG_7184

Our kids are hilarious (in our humble opinion) and I’ve been trying to find fun ways to memorialize the funny things they say. My Middlest came up with a JEWEL a few weeks ago that STILL makes me laugh when I think about it…and so I thought “embroider it”, OBVIOUSLY- duh.

Sorry if the word “toot” is offensive. I think it’s hilarious. My Oldest was teaching the Middlest to play “Rock, paper, scissors, shoot” and our middle girl got so excited to be playing that she got a little mixed up and yelled “Rock! Paper! Snickers! Toot!” and HILARITY ensued. Ha!
If you don’t have kids around to say funny things, you can also use your favorite song lyrics or quotes.

IMG_7058

These are detail pictures of the quilt I was working on when we were in that little apartment. I drew some of our daughter’s favorite book characters and then embroidered them and used them as quilt squares for her big girl quilt when we moved her from her crib. It is so fun, I am so glad I tried it!
Quiltcollage

This is a really easy thing to pick up and try so I am including some close ups of the stitches I used on these two pieces. I also am giving away the light bulb pattern for free in case anyone wants to use it. Click over to our SHOP to download the Pdf and then simply place your fabric over the print out and trace.

This would be an easy pattern for a child to try out as well if anyone has elementary aged kiddos who are interested in learning to sew.

embroidery2

Couplejonesprojects3

Thanks for reading! I hope you give this a try if it looks like fun! Do your kids say funny things that you record somewhere? I’d love to hear how you keep track of them! AND their funniest quote! Em

DIY Kindle Case

When I was in Elementary School and Jr High, we always had to cover our school books. Did you do that too? I LOVED it. I loved covering the boring design of my math books or history books with a more BEAUTIFUL design…my favorites were Lisa Frank and Mary Engelbert…did you love those too? Chances are, if you were a child of the late 80’s – early 90’s, you did. Who doesn’t love fluorescent unicorns?

Mary

lisa-frank


I think my past love of book covers is what prompted me to make my own case for the new Kindle Zac got me for Christmas. (AWESOME HUSBAND!!) I love my Kindle…it’s such a fun new toy! It plays music too – I’m in heaven. Books and music all at easy reach – did I mention cartoons for when I’m at the dr’s office with my three crazy talkative girls? Yes! Ok. So this awesomeness was floating around with no cover and instead of buying one that was pretty sterile and tech-y looking I decided to personalize it a bit. I started with some felt cut to a size that would wrap around the Kindle…I had every intention of getting this started real quick-like while my girls were watching a cartoon…sadly it was too close to that crazy hour we call dinnertime and the baby was NOT digging my decision. That’s her “fit stance”…sprawled on the floor, screaming.

Kindle10

So while holding the baby and talking to my middlest about how dinner was ALMOST ready and how No, she could not have ANOTHER apple because dinner was ALMOST ready,  I trimmed the felt to the right size.

I decided to wait until we put the kids to bed to get this thing finished. Surprised? ;)

I used two vintage handkerchiefs I got at a garage sale this summer. I sewed them around the felt like you would a pillow case, back to back and leaving a small opening to flip the square inside out after seaming… (oh and I definitely used my seam ripper because I was going too quickly and sewed the thing the wrong direction). Then when they were right side out, I sewed around the outside again so that the square would stay crisp.

2013-01-08 20.52.33

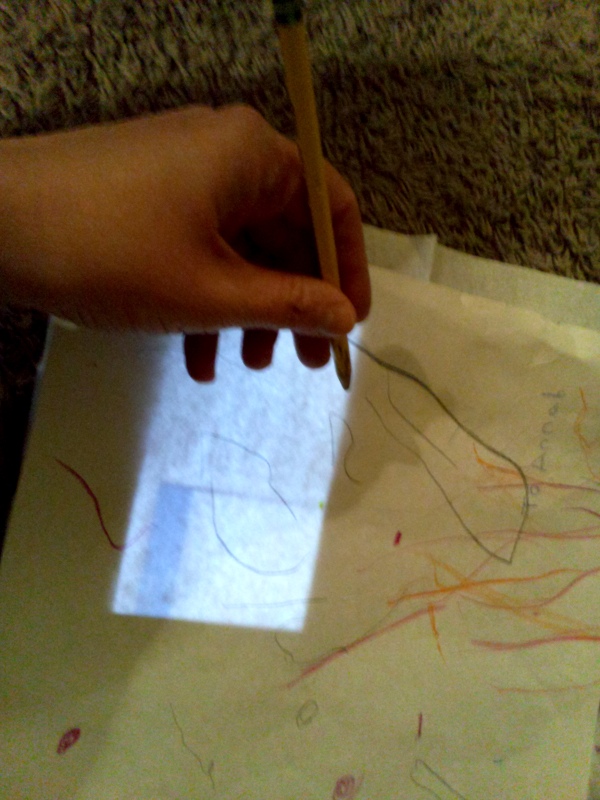
I used a piece of paper over the lit up Kindle to trace the size of the screen so that I could cut a hole through the felt that would allow me to read while the Kindle was still in it’s case.  Don’t push very hard with your pencil- just barely line the screen, too much pressure could damage it I think.

Kindle9

Then I cut a square out of felt that would hold the Kindle inside it’s case and used the traced and cut out square of paper to cut out the center of the square for reading. I sewed that square to the inside of the envelope. I forgot to document that process but it’s pretty straightforward.

Kindle7

This is the finished project and I love it. My high tech toy, but still vintage and fun :) PS I’m trying SO hard to drink more water and keep my resolution going (read about that HERE)

Kindle11

I snagged these handkerchiefs because I have family in both states and they are important places to me. I had some left over glitter ribbon from the Sparkle Skirt I made for my middlest girl’s birthday and some white trim left over from her quilt that I added just for fun.

Kindle6

To keep the envelope closed, I hand stitched a button to one side and a long ribbon to the other side, when the envelope is closed you can wind the ribbon around the button and it stays closed perfectly. I LOVE avoiding working on things like snaps and buttonholes ;) The easier and quicker, the better!

Kindle5

Kindle4

I love the way this turned out. It’s a little quirky but that makes sense. :) I know I could have gone out and bought a case, but this was more fun. And practically, the thick fabric will be a pretty good defense from all the fluids and sticky fingers flying around in my life right now…spilled drinks, etc.

Kindle2

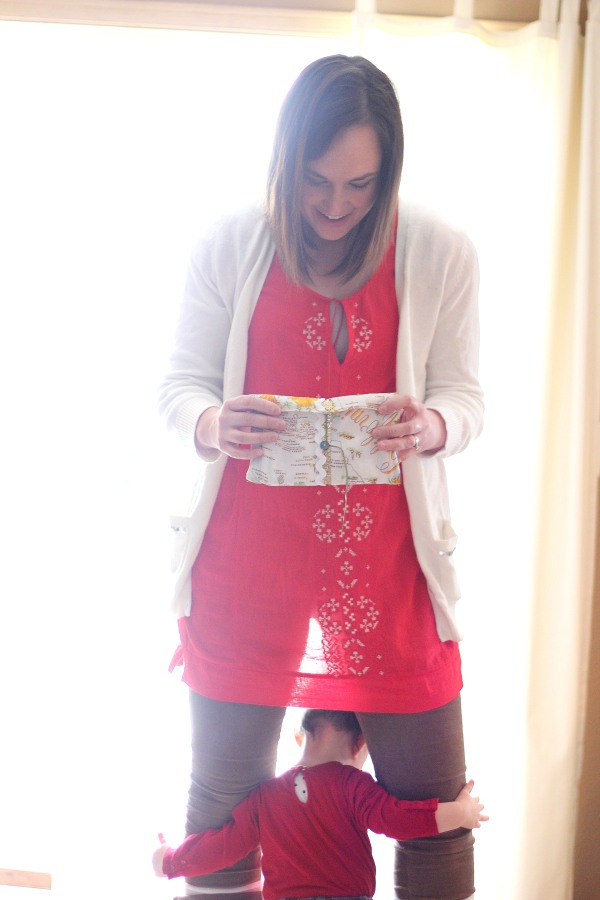
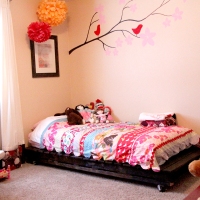
My attempts at action shots – real life is represented here. I had just gotten ready in real clothes (ie not sweats or pj bottoms) and we were almost walking out the door and the baby pushes through my legs but not without dragging her extremely runny nose across my pants. Corduroy is AWESOME for gathering snot…I didn’t know that. Now I do :)

I know this is a fairly nerdy DIY but I hope it inspires you to do something fun of your own, make something more personal to who you are :) emily

Kindle1

Instagram Weekend

image

image

We had a little adventure in our city this weekend. Didn’t take my good camera, just had my little (not an iphone) phone camera. It’s fun though, to try to get photos I like with the limitations I have to work around with my phone.
We went on a vintage hunt in some stores we’d heard about but had never been to. Fun. Our littlest was geeking out and pointing to everything in the stores that caught her eye…I think she’s a born vintage girl. Must have been all the garage sale-ing we did when I was pregnant. :)

image

imageimage

image

image

What did you do this weekend? Hope it was a fun one!

image

image

image

And then, one day, we put a door on the wall…

My husband and I love to garage sale. One day we fell in love with a door at a random barn sale that we happened upon. We didn’t know what we were going to do with it…
PS For the last 2 years of living in our home, it has irked me that our stairway was boring, stark white. HOWEVER, the ceiling is SUPER high and I’m just not all the excited about hopping up on a ladder over stairs to paint said stairway and I’m equally unexcited about paying someone to hop up on a ladder and paint it for me.
SO… with the irking of the stairway going on and this lovely door that we found, a brainstorm happened.
It was one of those times when everything works out – the kids took a long nap, we were able to find the tools we needed, we didn’t argue about which side of the door was more attractive, you know, the BIG stuff ;) …my husband and I were on the same page and stoked about our weird little idea. And at the end of the day we had a door on our wall…now, I’m fully aware that MOST people will not love having a sideways door on their wall.  You probably don’t think a sideways door is awesome like we do…that’s totally fine… this is just an example of how we had an idea and went with it and love it. So find a color that you love or a painting or a piece of art and ROCK it! No one should only decorate their home based on what everyone else is doing ;)
CoupleJones Door 
Letters and tin from Hobby Lobby, lyric painting inspired by A Beautiful Mess (have you seen THIS post from Elsie? I LOVE it!) , Bunny Slippers painting by my Mother in Law :)
CoupleJones door

A Party for Antioch, August 25, 2012

Several weeks ago, out of the blue, I had this phrase stuck in my head “Let’s do something Good.” I was driving on the freeway and it was a random thought. But it didn’t pass, it just sat there in the back of my mind like thoughts tend to when they come from Someone bigger than me. I started to wonder if I could put something together that would be fun and bless our friends and at the same time accomplish “something good.”

So I prayed about it…and started moving forward. There were MANY times when I started to doubt that I could pull it all together, feel stupid or embarrassed for even trying, but each time I felt like I would see confirmations from the Lord that I should quit with all the doubt and worry about things that don’t matter and just keep moving forward.

I had no idea what the Lord had planned but I went with it.

With help from my husband and my sister, and so many contributions from our friends and some really cool shops, we were able to host a party and raffle that raised over $550 for Antioch Adoptions here in town. Which was totally amazing!! Thank you to everyone that helped us out – we were so blessed by what the Lord was able to accomplish! I took the donations to Antioch this afternoon and I am so excited that we were all able to help them out even a little!
PS Homemade photo-booths are SUPER fun :)
Image
ImageImageImage

Jewelry display from half a pallet

image

Our party for Antioch Adoptions is coming up this weekend and this beautiful jewelry from 31 Bits was donated to our raffle. I needed a way to display it so I had Zac saw the end of an old pallet we had in our yard so that it looks like an old ladder. Gosh, I’m glad we still had these palleta left over from LAST SUMMER when we were putting in sod ….spending the winter layin’ around outside gave them some awesome texture….we SO meant to do that. Heh. I just painted the ladder with some paint I watered down so it would add to the weathered look and then screwed in some little hooks I picked up at Home Depot. I lo e the way it turned out!

  • Free Stuff
  • Join 164 other subscribers
  • Your Favorite CoupleJones Posts

    DIY Twin Bed from Wood Pallets
  • We Love!

    a little artsy
  • Caila Made
  • Our-Weekends-Titled
  • CoupleJones
    Grab Our Button Code ↓
    <a href="http://www.CoupleJones.com" target="_blank"> <img src="https://couplejones.files.wordpress.com/2013/01/couplejones_widget.jpg" border="0" alt="CoupleJones" />
  • CoupleJones
    Grab Our Button Code ↓
    <a href="http://www.CoupleJones.com" target="_blank"> <img src="https://couplejones.files.wordpress.com/2013/03/couplejonesinspire.jpg" border="0" alt="CoupleJones" />
  • Categories